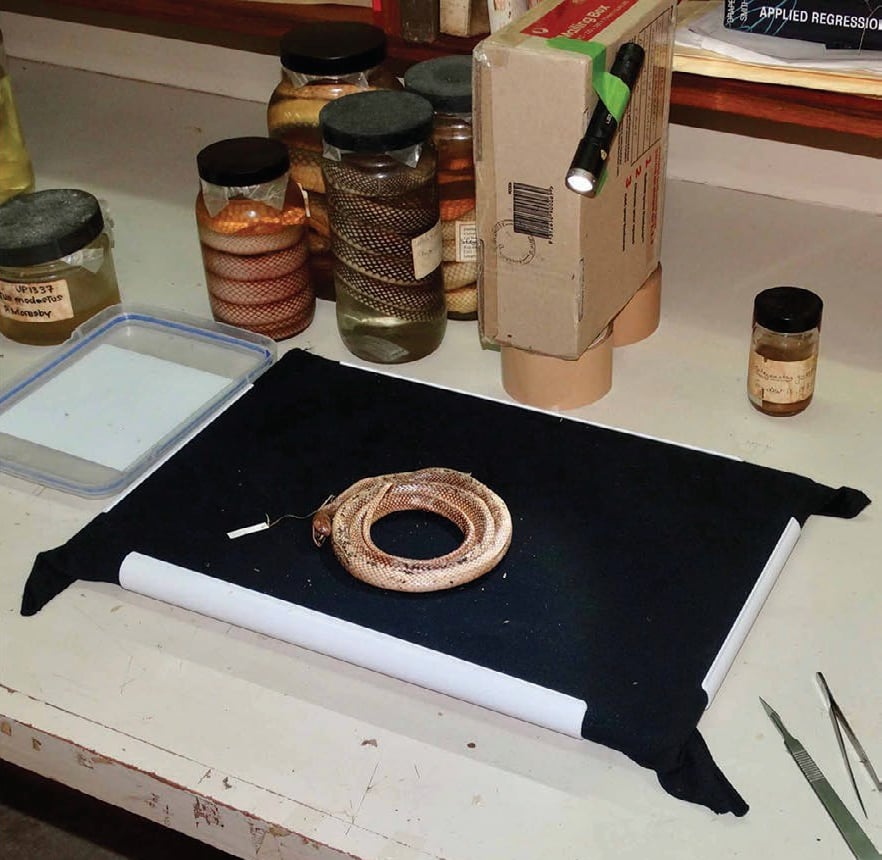
Portrait of a Pickled Snake
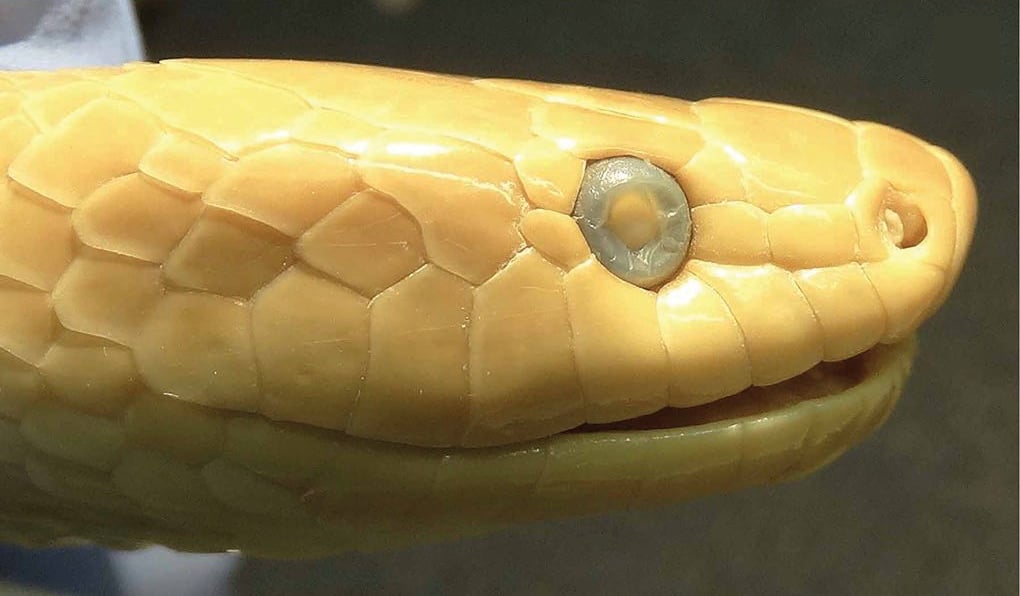
Photo: Hinrich Kaiser, from Kaiser et al. 2018, Herpetological Review
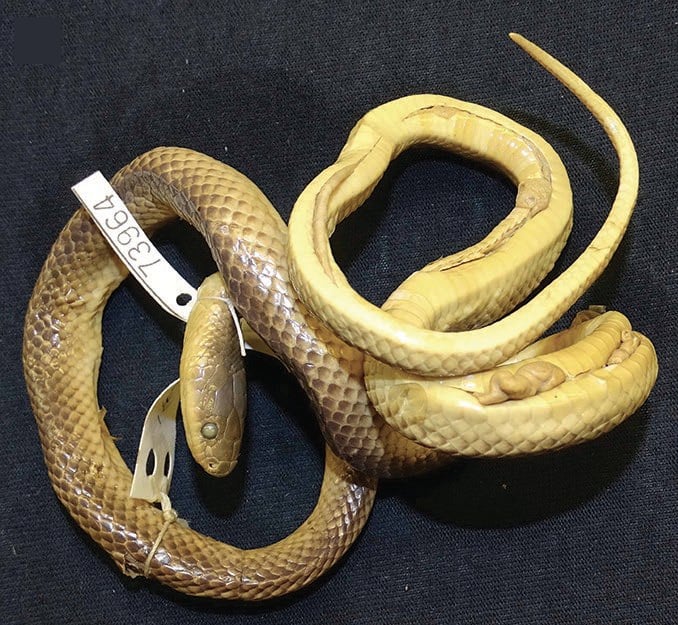
The photo studio in the picture above is mostly improvised. The black background is cut from a cotton T-shirt. The white frame holding it tight came from a craft store, where it was sold for crochet. The light is a small torch, taped to a cardboard box that is propped up on two rolls of packing tape. The bench belongs to the University of Papua New Guinea in Port Moresby, and the snake coiled in the middle has spent the years since its capture in a jar of preservative.
With this kind of kit, Hinrich and I have photographed snakes in museums around the world. In 2018, together with our friend Mark O'Shea and Kaitlin Rickerl, we wrote down exactly how we do it, so that anyone on a small budget could do the same.
Why photograph a dead snake?
My research is on Indo-Papuan groundsnakes, and the specimens I need are scattered across natural history museums on several continents. To know what a species really looks like, you have to see the original specimens, and nothing replaces holding them in your hands. But you cannot visit every museum every time a question comes up, and precious specimens are not always sent out on loan.
A good set of photos changes that. If we photograph a snake carefully from all the important angles, we can go back to it at home, months later, and count its scales or compare its head shields with those of another snake from a museum on the other side of the world. The museum can also keep the images and share them, so the next researcher can take a first look before deciding whether to travel.
There is a sadder reason too. Museums burn and are bombed. In our paper we listed a few of the collections that have been lost in whole or in part: Dresden in 1945, the Museu Bocage in Lisbon in 1978, the Instituto Butantan in São Paulo in 2010, the National Museum of Natural History in Delhi in 2016, and the Museu Nacional in Rio de Janeiro in 2018. A photograph is a permanent record of a specimen as it was on the day it was taken.
The kit
We did not want an expensive studio. Most biologists, especially students, work on tight budgets, and heavy camera gear is a burden on airplanes. So we used advanced compact cameras (Sony models of more than 20 megapixels), bought refurbished for just under 300 US dollars each. The one thing the camera must have is manual focus, because light glinting off a wet snake easily confuses autofocus.
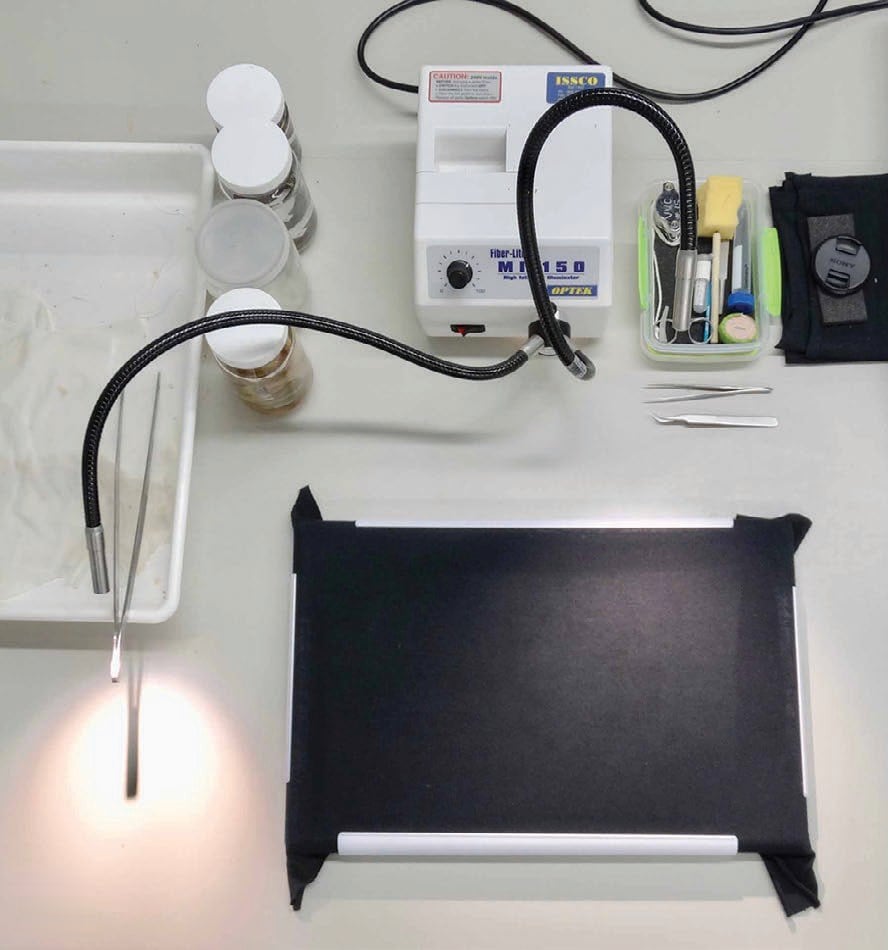
For light, a goose-necked lamp is ideal when a museum has one. When it doesn't, we use a small LED torch that runs on a single AA battery, because AA batteries can be bought almost anywhere. A strip of masking tape fixes it to whatever is at hand: a piece of furniture, a box or a plastic jug.
The background took the most trial and error. It had to be dark and not shiny, dry quickly, hide the stains of preservative dripping off specimens, and fold into a suitcase. Our answer is a plastic crochet frame, 43 by 35 centimetres, which cost less than 20 dollars. Into it we clip a piece cut from a plain black cotton T-shirt (one shirt gives at least two pieces). When a snake is laid on the stretched cloth, the fabric sags a little and cradles it, which steadies the specimen and softens the shadows. With this setup we have photographed coiled snakes up to 1.8 metres long.
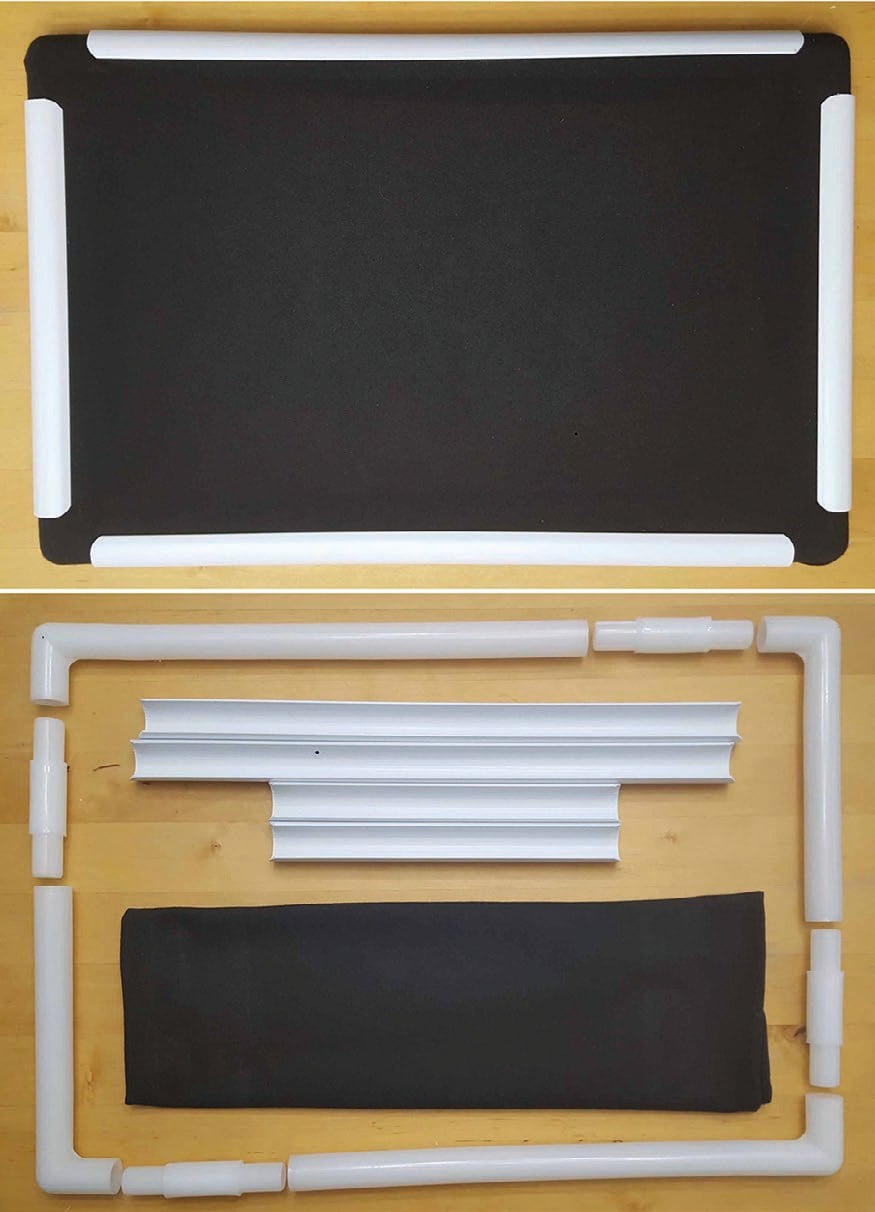
Some specimens were preserved with kinks that stop them lying flat. For those, we tie strong nylon fishing line tightly across the frame to hold the body down. The lines can be removed from the image afterwards.
A snake in one hand, a camera in the other
For close-ups, we hold the snake. The head is gripped firmly in the left hand and the camera held in the right, with the camera hand resting on the snake hand and both elbows on the table. That makes the snake, the light and the camera one small system that can be tilted a few millimetres at a time until the scales catch the light without glare.
Every series starts with the same picture: the specimen with its museum tag, so the images can never be separated from the animal. If several untagged snakes share a jar, we sort them from largest to smallest and photograph each with a hand-drawn letter.
Then come the standard views: the whole body from above and from below, and the head from above, from below and from the side.
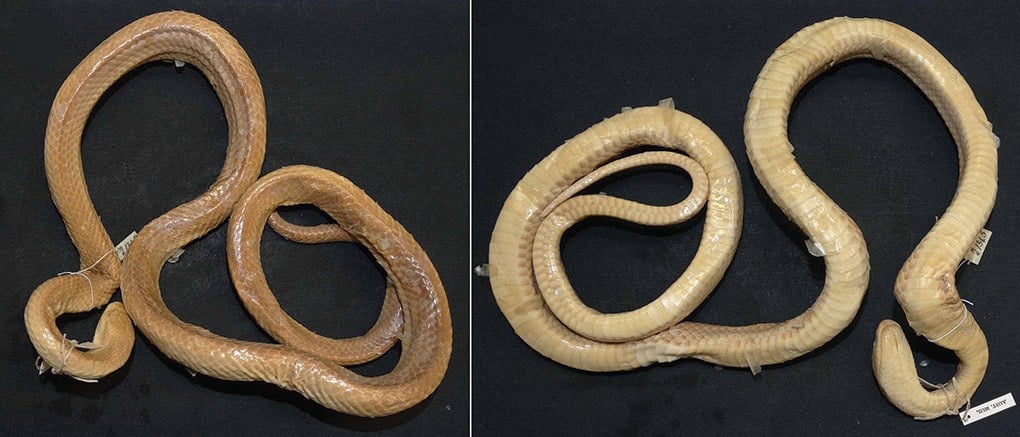
The belly view matters most. Snakes are told apart partly by the number of broad scales across the belly and the pairs of scales under the tail. With patience, a coiled snake can usually be pressed gently flat for a moment so that every belly scale is visible. In our experience with more than 2,000 specimens, over 85% could be photographed this way. Back home, we count the scales on screen by putting a small black dot on each one. It is reliable, it needs no pins, and it shortens the time we have to spend in the collection.
The head views let us compare the large plates on a snake's head. We found that measuring the relative sizes of these plates on a good photo was more accurate and more repeatable than measuring them with calipers on a slippery specimen. When three different people measured the same length on an image ten times, the error was 0.9%.
Glare, blur and snakes in knots
Some problems never go away. A snake that has just come out of preservative is wet and shiny, and it keeps seeping. We blot it with a paper towel, work fast so it doesn't dry out, and tilt it until the reflections move off the parts we need to see. Some glare is unavoidable, and the tip of the snout usually looks a little brighter than the rest of the head because it faces the light.
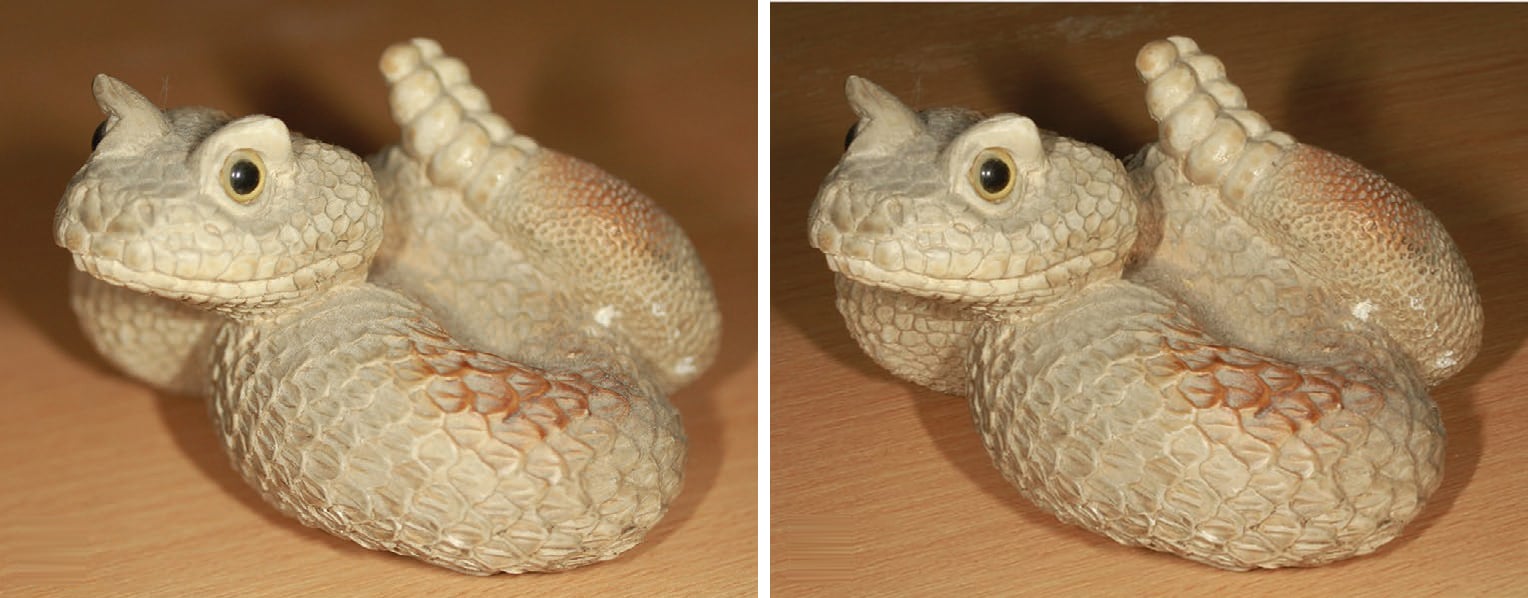
Blur is the other enemy. Many old specimens are twisted in three dimensions, so a photo with a shallow zone of sharpness leaves half the snake fuzzy. The cure is a small aperture, good light, and sometimes stepping back and cropping the image later.
And then there are specimens that were dropped into preservative alive or freshly killed a century or more ago and set in whatever knot they happened to form. Some have skin that has softened or crumpled, or a damaged head. We photograph them anyway. A specimen's importance may not be obvious on the day you see it, and even a poor specimen yields scale counts. So far we have not met a snake whose head we could not photograph, although a few have taken real effort.
Forty snakes a day
Specimen photography is harder on the body than it looks. Over an eight-hour day, we can photograph 30 to 40 snakes properly. With at least three shots of each view, that is 750 images or more, each taken while holding a camera of 660 grams. The strain on muscles and joints should not be underestimated, and we advise scheduling photo sessions with that in mind.
Every evening we copy the day's pictures to a computer, back them up and weed out the blurred and dark ones, so that anything we missed can be reshot the next day. Each specimen gets its own folder, each file name says which view it shows, and everything is stored on two computers, two backup drives and in the cloud. We also offer the images to the museums.
"2D imaging of snake specimens is designed so that information about specimens can be shared more readily across the globe." — Kaiser et al. 2018
None of this replaces the real thing. Examining actual specimens remains one of the key best practices for anyone who names species, and we still travel to see them. But a careful photograph lets the next person decide, from anywhere in the world, whether they need to make that trip too.
This paper became part of my doctoral dissertation at the Philipps-Universität Marburg. Our museum work for it was paid for privately, apart from a travel grant to Mark.
The papers
- (2018) A portable, low-cost approach for photographing fluid-preserved snake specimens: recommendations with comments on optimizing specimen photography in natural history collections Herpetological Review 49(4): 666–677